Blog

  • Common Signs of Emotional Exhaustion That Are Easy to Miss

    Common Signs of Emotional Exhaustion That Are Easy to Miss

    I used to think exhaustion always looked dramatic: cancelling every plan, losing control, or reaching a visible breaking point. In reality, emotional depletion often develops quietly. It may begin as irritability, poor concentration, restless sleep, or the feeling that ordinary responsibilities require too much effort.

    Recognising the Common Signs of Emotional Exhaustion early can help you respond before prolonged stress affects your health, relationships, and daily functioning.

    What Is Emotional Exhaustion?

    Emotional exhaustion is a state of mental and emotional depletion caused by prolonged or repeated stress. It develops when responsibilities keep demanding energy without enough time, support, or opportunity for recovery.

    Work pressure is only one cause. Caregiving, conflict, grief, financial strain, health concerns, major changes, and constant digital availability can also drain emotional resources. Unlike ordinary tiredness, the heaviness may remain even after sleep.

    Emotional Exhaustion vs Ordinary Tiredness

    Ordinary tiredness usually follows a demanding day or lost sleep and improves with rest. Emotional exhaustion is more persistent, affecting motivation, memory, mood, decision-making, and social connection.

    You may technically be resting while still feeling tense or mentally switched on. This is one reason emotional depletion can be difficult to recognise at first.

    12 Warning Signs You May Be Emotionally Drained

    12 Warning Signs You May Be Emotionally Drained

    1. Rest Does Not Refresh You

    You may sleep for several hours and still wake up feeling depleted. Prolonged stress can reduce sleep quality by keeping the mind alert and the body tense throughout the night.

    2. Small Tasks Feel Overwhelming

    Replying to a message, preparing food, paying a bill, or making an appointment may suddenly feel like a major demand. Everyday responsibilities can appear far more difficult than they normally would.

    3. You Become Irritated Easily

    Minor delays, routine questions, background noise, or small mistakes may trigger stronger frustration. Your reactions can become more intense because your emotional capacity is already stretched, making it especially important to create a balanced self care routine that supports recovery and resilience.

    4. You Feel Numb or Detached

    You may lose excitement, interest, or emotional connection. Activities and relationships that once mattered may begin to feel distant. Emotional numbness can appear when the mind has been under pressure for too long.

    5. Your Motivation Disappears

    You may understand what needs to be done but struggle to begin. Work, hobbies, household tasks, and personal goals can start to feel pointless or exhausting.

    6. Concentration Becomes Difficult

    You may forget conversations, reread the same information, lose your train of thought, or struggle with simple decisions. This mental fog can also lead to mistakes and unfinished tasks.

    7. You Withdraw From Other People

    Calls, plans, and conversations may feel like additional responsibilities. You may avoid people you normally enjoy because social interaction requires energy you do not feel able to provide.

    8. Your Sleep Pattern Changes

    You may struggle to fall asleep, wake frequently, oversleep, experience vivid dreams, or feel tired throughout the day. Some people wake with a racing mind even after spending enough time in bed.

    9. Your Appetite or Digestion Changes

    Long-term stress can affect eating habits and digestion. You may skip meals, rely on comfort food, lose your appetite, or experience nausea, indigestion, bloating, and stomach discomfort.

    10. Physical Tension Increases

    Headaches, jaw clenching, tight shoulders, muscle aches, chest tightness, and a racing heartbeat can accompany emotional strain. New, severe, or persistent physical symptoms should be medically assessed.

    11. Your Daily Performance Declines

    You may make more mistakes, miss deadlines, arrive late, or need longer to complete familiar responsibilities. This decline can affect work, studies, household duties, and personal commitments.

    12. You Feel Hopeless or Trapped

    Emotional depletion can create the belief that nothing will improve. Persistent hopelessness deserves professional attention. Anyone experiencing thoughts of self-harm or feeling unsafe should seek immediate emergency or crisis support.

    What Causes Emotional Exhaustion?

    Emotional exhaustion usually develops through accumulated pressure rather than one single event. Heavy workloads, caregiving, relationship conflict, financial uncertainty, grief, illness, discrimination, and lack of control can all contribute.

    The risk increases when you feel unsupported or unable to set limits. Perfectionism may also continue the stress cycle, especially when rest feels undeserved or every task must meet unrealistic standards.

    Emotional Exhaustion, Burnout, Anxiety, and Depression

    Emotional Exhaustion, Burnout, Anxiety, and Depression

    Emotional exhaustion is a major feature of burnout, but the terms are not identical. Burnout often includes detachment, cynicism, and reduced effectiveness connected to a demanding role or environment.

    Anxiety commonly involves persistent worry, fear, and physical alertness. Depression may include prolonged low mood, loss of pleasure, hopelessness, sleep or appetite changes, and difficulty functioning.

    These experiences can overlap. Persistent or disruptive symptoms should be discussed with a qualified professional instead of being self-diagnosed.

    Practical Ways to Begin Recovering

    Start by reducing one avoidable demand. Delay a nonessential commitment, silence unnecessary notifications, ask someone to share a task, or divide a large responsibility into one manageable step.

    Protect regular meals, hydration, gentle movement, and consistent sleep. These habits may not remove the underlying cause, but they can support your body while you address it.

    Identify your biggest energy drain and separate what you can control from what you cannot. A trusted friend, family member, manager, counsellor, doctor, or therapist may help you identify realistic options.

    Recovery also requires boundaries. This might mean ending work at a defined time, limiting draining conversations, protecting personal time, or saying no before your schedule becomes unmanageable.

    When to Seek Professional Support

    Consider professional support when symptoms continue for several weeks, interfere with responsibilities, damage relationships, or worsen despite rest and lifestyle changes.

    Help is particularly important when emotional depletion is accompanied by panic, substance use, severe sleep problems, persistent hopelessness, or thoughts of self-harm. A healthcare professional can also determine whether another mental or physical condition is contributing.

    Frequently Asked Questions

    1. What Are the Common Signs of Emotional Exhaustion?

    Frequent signs include ongoing fatigue, irritability, emotional numbness, low motivation, poor concentration, social withdrawal, sleep changes, physical tension, and reduced performance.

    2. Can Emotional Exhaustion Cause Physical Symptoms?

    Yes. It may be accompanied by headaches, muscle tension, digestive discomfort, appetite changes, disturbed sleep, chest tightness, and a racing heartbeat.

    3. Is Emotional Exhaustion the Same as Burnout?

    No. It is often a major part of burnout, but it can also result from caregiving, grief, relationship strain, illness, financial stress, or other prolonged demands.

    4. How Long Does Emotional Exhaustion Last?

    Recovery time varies according to the cause, severity, available support, and whether the main source of stress can be reduced or managed.

    Final Thoughts

    I believe emotional exhaustion becomes easier to address when we stop treating it as a personal failure. Feeling depleted does not mean you are weak or incapable. It may simply mean your current demands have exceeded your available emotional resources for too long.

    I would begin with one honest question: what is taking the most energy, and what can realistically change this week? A small boundary, a direct request for help, protected rest, or professional support can become the first meaningful step toward steadier energy, clearer thinking, and emotional balance.


  • How to Reduce Screen Time Before Bed: Simple Sleep Fix

    How to Reduce Screen Time Before Bed: Simple Sleep Fix

    I used to treat late-night scrolling as harmless downtime. One message or short video often became another hour awake. Learning How to Reduce Screen Time Before Bed showed me that the problem was not only blue light. Notifications pulled me back, stimulating content kept my mind alert, and my phone replaced time that should have gone to sleep.

    The solution is not an extreme digital detox. A realistic evening system works better. Start with a 30- to 60-minute screen-free period and make calming alternatives easier to choose than another app.

    Why Screens Can Disrupt Sleep

    Electronic devices affect sleep in several ways. Light from phones, tablets, televisions, and laptops may delay the body’s natural evening signals. A bright screen close to the face can make the brain behave as though the day is continuing.

    Content matters too. Work emails, news, games, short videos, and emotional posts can increase alertness. Using night mode to reduce blue light may make a display appear warmer, but it cannot stop the mind from reacting to stressful or exciting information.

    Screens also steal time. A five-minute check can turn into prolonged scrolling, pushing bedtime later and reducing total sleep. This is often called bedtime procrastination.

    How Long Before Bed Should Screens Stop?

    A practical starting point is 30 to 60 minutes before bedtime. People with racing thoughts, insomnia, or compulsive scrolling may benefit from extending the break to 90 minutes.

    Test one consistent cutoff for a week. Notice how quickly you fall asleep, whether you wake during the night, and how you feel the next morning. The best schedule is the one you can repeat.

    10 Practical Ways to Use Screens Less at Night

    10 Practical Ways to Use Screens Less at Night

    Set a Digital Curfew

    Choose a fixed time when social media, entertainment, and nonessential work end. Connect it to brushing your teeth or preparing for the next day.

    Charge Your Phone Away From the Bed

    Use a hallway, kitchen, or home-office charging station. Distance turns automatic checking into a deliberate choice.

    Replace the Phone Alarm

    A basic alarm clock removes a common reason for keeping a phone beside the bed.

    Silence Notifications

    Use Do Not Disturb, Focus, or Bedtime settings. Allow calls from selected contacts when necessary.

    Set App Limits

    Restrict social media, video, gaming, news, and shopping apps during the evening with built-in device controls.

    Make the Screen Less Tempting

    Reduce brightness, enable grayscale, use warmer display settings, and remove distracting apps from the home screen.

    Identify the Trigger

    Ask what you want when you reach for the phone. It may be entertainment, stress relief, connection, avoidance, or personal time. Choose an offline activity that satisfies the same need.

    Build a Replacement Routine

    Read a printed book, journal, stretch, meditate, take a warm shower, listen to quiet music, or prepare for tomorrow.

    Reduce Gradually

    Move your usual stopping time earlier by 15 minutes every few nights. Gradual improvement is easier to sustain than an ambitious rule.

    Track the Benefits

    For one week, record bedtime, estimated sleep time, nighttime awakenings, and morning energy. Visible progress makes the habit feel rewarding.

    What to Do When Nighttime Screen Use Is Unavoidable

    Work, caregiving, travel, or urgent communication may require evening device use. In those situations, focus on reducing the impact and use the moment to practice mindfulness in daily life by noticing your posture, breathing, and emotional response while using the device.

    Lower brightness, increase the distance between your eyes and the display, and use warm screen settings. Avoid arguments, stressful news, complex work, and fast-paced entertainment. Complete the necessary task, close the device, and return to a calming activity.

    A purposeful ten-minute session is easier to stop than open-ended browsing.

    Try a Seven-Day Digital Reset

    Try a Seven-Day Digital Reset

    On day one, review your screen-time report and identify the apps responsible for most evening use. On day two, set a 30-minute cutoff. On day three, disable nonessential notifications. On day four, create a charging area away from the bed.

    On day five, choose two enjoyable screen-free activities. On day six, move the phone out of the bedroom or beyond easy reach. On day seven, compare your sleep, mood, and morning energy with the beginning of the week.

    The goal is not to eliminate technology. It is to stop technology from controlling the final part of your evening.

    Helping Children and Teenagers Build Better Habits

    Families benefit from clear expectations. Establish a shared charging area, device-free bedrooms, and a regular cutoff on school nights. Explain that the rule supports sleep rather than presenting it only as punishment.

    Adults should model the behavior they expect. Encourage reading, drawing, puzzles, quiet conversation, or preparation for the following day.

    Frequently Asked Questions

    1. What is the easiest way to begin How to Reduce Screen Time Before Bed?

    Start with a 30-minute cutoff, silence notifications, and charge the phone beyond arm’s reach.

    2. Is night mode enough to protect sleep?

    No. It may reduce some light exposure, but it does not stop stimulating content or delayed bedtime.

    3. Should the phone stay outside the bedroom?

    That is often helpful, although placing it across the room is a practical first step.

    4. What can replace evening scrolling?

    Reading, journaling, stretching, meditation, quiet music, a warm shower, or planning the next morning can all work.

    A Better Night Starts With One Boundary

    I have found that better sleep begins when the evening has a clear ending. I do not need to reject technology or follow a flawless routine. I only need to make the healthier action easier than opening another app.

    A reliable cutoff, a phone-free sleeping area, and one enjoyable replacement activity can change the tone of the night. Small boundaries repeated daily are more powerful than occasional digital detoxes. The reward is more time to rest, recover, and begin tomorrow with greater clarity.

  • How to Create a Balanced Self-Care Routine

    How to Create a Balanced Self-Care Routine

    I used to think self-care required long mornings, costly products, or an empty calendar. That belief made it easy to postpone. Once I began treating it as a series of small, supportive choices rather than a special event, it became easier to maintain.

    Learning How to Create a Balanced Self-Care Routine begins with recognizing that genuine care supports more than physical health. Sleep and movement matter, but so do emotional rest, mental stimulation, relationships, personal values, and a comfortable environment. The goal is not a perfect checklist. It is a flexible system that helps you feel steadier and better prepared for daily life.

    What Makes a Self-Care Routine Balanced?

    A balanced routine supports physical, mental, emotional, social, spiritual, and practical needs. These areas affect one another. Poor sleep can lower patience, social isolation and loneliness can reduce motivation, and a stressful environment can make relaxation difficult.

    Balance does not mean giving every area equal attention each day. It means noticing what currently needs support. During a demanding week, sleep and emotional recovery may deserve priority. At another time, connection, creativity, or movement may need more space.

    Assess Your Needs Before Choosing Habits

    Consider your energy, mood, sleep, stress, relationships, surroundings, and workload. Notice where you feel depleted, tense, disconnected, or disorganized.

    Then identify habits that genuinely help. A workout may restore one person and exhaust another. Journaling may provide clarity, while music, gardening, prayer, reading, or a quiet walk may suit someone else.

    Your routine should reflect your schedule, finances, preferences, and responsibilities. Free practices can be as valuable as paid activities.

    Build the Routine Step by Step

    Build the Routine Step by Step

    Begin With Physical Essentials

    Start with consistent sleep, nourishing food, hydration, movement, hygiene, and necessary health care. These habits create the foundation for emotional and mental well-being.

    Avoid changing everything at once. Choose one action that would noticeably improve your day, such as setting a regular bedtime or preparing breakfast in advance.

    Add Emotional and Mental Support

    Create space to process thoughts instead of carrying them all day. Try journaling, breathing exercises, meditation, therapy, reading, creative work, or a short screen-free break.

    Emotional care also includes boundaries. Saying no, asking for help, stepping away from an unproductive argument, and choosing to break up with your commitments when they no longer support your well-being can protect your energy.

    Support Connection and Meaning

    Schedule time with people who leave you feeling respected, while also protecting quiet time when interaction becomes draining.

    Spiritual care does not have to be religious. Reflection, prayer, nature, gratitude, volunteering, or any practice connected to meaning can fill this role.

    Attach Habits to Existing Routines

    Habit stacking makes new actions easier to remember. Stretch after brushing your teeth, breathe slowly before opening your laptop, or write one journal sentence after dinner.

    Keep the action small. Five minutes of simple breathing exercises completed regularly is more useful than an ambitious hour repeatedly postponed.

    Organize Self-Care by Frequency

    Daily care should focus on brief essentials, such as hydration, nourishing meals, movement, screen-free time, and a calming bedtime cue.

    Weekly care can include meal preparation, a longer walk, a hobby, a meaningful conversation, or reviewing the week ahead.

    Monthly care offers a wider view. Review appointments, spending, workload, relationships, goals, and habits that no longer help. Adjust the routine rather than forcing an outdated plan.

    Create Minimum, Normal, and Reset Versions

    Create Minimum, Normal, and Reset Versions

    A three-level system keeps the routine useful when energy changes. The minimum version is for difficult days and may include medication, food, water, hygiene, and five quiet minutes.

    The normal version can combine two or three supportive actions. The reset version is a longer weekly practice involving rest, planning, nature, creativity, or household organization.

    This approach prevents one imperfect day from becoming a failed week.

    Follow a Flexible Seven-Day Rhythm

    Use Monday to identify your main need. Let Tuesday focus on movement, Wednesday on connection, and Thursday on a mental or creative activity. Friday can release stress, Saturday can provide deeper restoration, and Sunday can be used to review the week and prepare for the next one.

    Treat the schedule as a guide, not a rule. Swap activities whenever your energy or responsibilities change.

    Stay Consistent Without Adding Pressure

    Place important activities on your calendar. When time is limited, shrink the habit instead of abandoning it.

    Track results rather than perfect streaks. Once or twice a week, rate your stress, energy, mood, and sleep. Replace practices that do not improve your well-being.

    Common mistakes include copying someone else’s plan, filling every free moment, or using self-care to avoid responsibilities. Rest matters, but balanced care also includes boundaries, preparation, and actions that protect future well-being.

    Frequently Asked Questions

    1. What is the first step in How to Create a Balanced Self-Care Routine?

    Identify the area of life that feels most depleted, then choose one small action that directly supports it.

    2. How much time should daily self-care take?

    Even five to fifteen focused minutes can help when the activity matches your needs and is repeated consistently.

    3. What should I do after missing several days?

    Restart with the minimum version instead of trying to compensate with an unrealistic schedule.

    4. How can I tell whether my routine is working?

    Look for gradual improvements in energy, sleep, concentration, emotional steadiness, relationships, or stress management.

    A Routine That Grows With You

    I no longer see self-care as something I earn after completing everything else. I see it as maintenance that helps me meet responsibilities without constantly running on empty.

    The best routine is not the most impressive one. It is the one that fits ordinary days, survives difficult weeks, and changes when life changes. By checking my needs, choosing small actions, and reviewing what genuinely helps, I can build a routine that feels supportive rather than restrictive.

  • Simple Breathing Exercises for Anxiety Relief

    Simple Breathing Exercises for Anxiety Relief

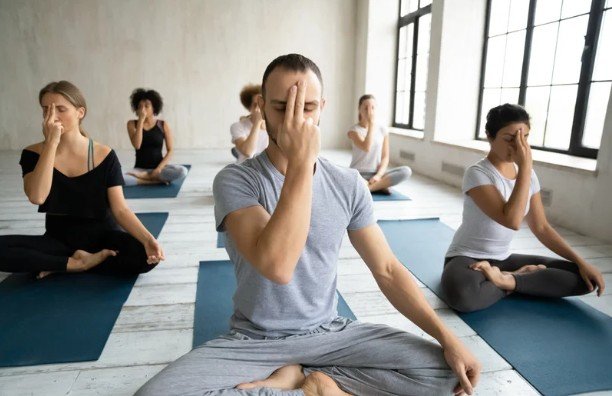
    When anxiety rises, I often notice my breathing change first. My chest tightens, my breaths become shallow, and my thoughts move faster. In those moments, Simple Breathing Exercises for Anxiety Relief can create a useful pause. They may not remove every anxious feeling, but they can help the body slow down enough for the mind to regain perspective.

    These techniques require no equipment. You can practice them at home, at work, before sleep, or during a stressful moment. The goal is to breathe gently and comfortably.

    How Controlled Breathing May Help

    Anxiety can trigger fast, shallow breathing. That pattern may increase light-headedness, tingling, chest tightness, or a racing heartbeat, making fear feel stronger.

    A slower rhythm may interrupt the cycle by giving your attention a predictable task and helping tense muscles soften.

    Breathing exercises are coping tools rather than cures. Persistent or severe anxiety may require professional support.

    Which Exercise Should You Try First?

    Which Exercise Should You Try First

    Beginners often do well with belly breathing or extended-exhale breathing because neither requires a long hold. Box breathing suits people who prefer counting, while 4-7-8 breathing may work better during evening practice.

    Choose one technique and try it for two to five minutes. Comfort matters more than matching an exact count.

    1. Gentle Belly Breathing

    Sit in a supportive chair or lie down. Place one hand on your chest and the other on your abdomen.

    Inhale slowly through your nose and allow your stomach to rise slightly while your shoulders stay relaxed. Exhale gently and feel your abdomen soften.

    Continue without trying to fill your lungs completely.

    2. Extended-Exhale Breathing

    Inhale gently through your nose for three counts, then exhale slowly for five. Repeat without pausing. The exhale should feel smooth rather than forced. When three and five feel too long, use two counts in and three counts out. 

    Much like estimating premorbid intelligence helps establish a person’s earlier baseline, starting with a comfortable breathing rhythm can make the exercise easier to follow. This no-hold method may help before a difficult conversation, appointment, or stressful task.

    3. Box Breathing

    Sit upright and relax your jaw. Inhale for four counts, hold for four, exhale for four, and pause for four. Repeat three or four rounds.

    The structure gives the mind a simple focus. Use two or three counts if four feels uncomfortable. Stop the holds if you feel short of air.

    4. The 4-7-8 Technique

    Sit or lie comfortably. Inhale through your nose for four counts, hold for seven, and exhale slowly for eight.

    Beginners may shorten the pattern to two, three, and four. The goal is a longer exhalation, not perfect timing. Choose another exercise if holding your breath increases tension.

    5. Coherent Breathing

    Inhale for about five seconds and exhale for five seconds. Continue for around five minutes while keeping each breath light and quiet.

    This balanced rhythm can support a daily relaxation habit. A timer or soft audio cue may help.

    6. Teddy Bear Breathing for Children

    Ask a child to lie down with a small stuffed toy on the stomach. The toy should rise during a gentle inhale and lower during a slow exhale.

    Keep the activity playful and brief. Avoid demanding exact counts. Breathing slowly together may feel more reassuring than repeatedly telling an upset child to take a deep breath.

    What to Do if You Feel Dizzy

    What to Do if You Feel Dizzy

    Dizziness can happen when breathing becomes too deep, fast, or forceful. Stop the exercise, sit down, relax your shoulders, and return to your natural rhythm.

    Next time, take smaller breaths and avoid long holds. Seek medical advice when dizziness is severe, frequent, unexplained, or accompanied by chest pain, fainting, or significant breathing difficulty.

    How Often Should You Practice?

    Begin with two to five minutes once or twice daily. Practice while relatively calm so the technique feels familiar during stress.

    Consistency matters more than lengthy sessions. Connect practice with waking up, finishing work, or preparing for sleep. Increase the duration only when it remains comfortable.

    When Breathing Exercises Are Not Enough

    Breathing can help manage symptoms, but it cannot resolve every cause of anxiety. Professional support may be appropriate when worry disrupts sleep, relationships, work, study, or daily responsibilities.

    Seek urgent medical help for severe shortness of breath, crushing chest pain, fainting, bluish lips, confusion, or symptoms that feel different from your usual anxiety. Not every breathing problem is caused by stress.

    Frequently Asked Questions

    1. What are the easiest Simple Breathing Exercises for Anxiety Relief?

    Belly breathing and extended-exhale breathing are beginner-friendly because they use a comfortable rhythm without long holds.

    2. Can breathing exercises stop a panic attack?

    They may ease symptoms and provide a focus point, but they may not stop every attack. Recurring panic attacks deserve professional guidance.

    3. How quickly can slow breathing help?

    Some people notice a change after a few rounds, while others need several minutes. Avoid forcing an immediate result.

    4. Is Daily Breathing Practice Safe?

    Gentle practice suits many people, but anyone with a heart, lung, or other medical condition should ask a healthcare professional about long breath holds.

    Final Thoughts

    When I feel anxious, I remind myself that I do not need the biggest possible breath. I need a quieter, steadier one. A few minutes of gentle practice can create enough space to respond instead of react.

    I would start with belly breathing or a longer exhale, keep every count comfortable, and practice during calm periods. Breathing cannot replace medical or mental health care, but it can become a reliable part of a broader anxiety-management plan.

  • How to Improve Flexibility with Daily Stretching

    How to Improve Flexibility with Daily Stretching

    I once assumed flexibility depended on age, natural ability, or hours of difficult exercise. What changed my mind was learning that small, repeated movements can make everyday actions feel easier. 

    How to Improve Flexibility with Daily Stretching starts with a realistic routine rather than an extreme challenge. Ten controlled minutes can gradually reduce stiffness, improve movement, and make workouts and daily tasks more comfortable.

    Why Daily Stretching Supports Better Movement

    Flexibility is the ability of muscles to lengthen comfortably, while mobility is the ability to control movement through a joint’s range. Both matter when bending, reaching, climbing stairs, exercising, or sitting for long periods.

    An occasional session may provide temporary relief, but regular practice gives the body repeated opportunities to adapt. Consistency matters more than forcing a deep position. Gentle tension is useful; sharp pain is not.

    What to Know Before Stretching

    Static stretches usually feel better when the body is warm. Begin with three to five minutes of walking, marching in place, or relaxed arm circles. Move slowly, breathe normally, and never bounce.

    Hold most positions for 20 to 30 seconds and repeat both sides when needed. Use a wall, chair, towel, or strap for support. Anyone recovering from an injury or experiencing unexplained pain should seek professional guidance first.

    A 10-Minute Full-Body Stretching Routine

    A 10-Minute Full-Body Stretching Routine

    Neck and Shoulder Stretch

    Sit or stand tall. Bring one ear gently toward the same-side shoulder without lifting the shoulder. Hold, return to the center, and switch sides.

    Doorway Chest Stretch

    Place one forearm on a doorway with the elbow near shoulder height. Step forward until a mild stretch is felt across the chest. Avoid arching the lower back.

    Cat-Cow Movement

    Start on your hands and knees. Inhale while gently arching the spine and opening the chest. Exhale while rounding the back. Complete five to eight slow repetitions.

    Child’s Pose

    Move the hips toward the heels while reaching the arms forward. Rest the forehead on a cushion if needed, and widen the knees slightly for comfort. This gentle position can become part of a calming evening routine designed to reduce screentime before bed.

    Low-Lunge Hip-Flexor Stretch

    From a kneeling position, step one foot forward. Keep the torso upright and shift the hips forward until the opposite hip stretches. Place a towel beneath the back knee.

    Figure-Four Glute Stretch

    Lie on your back with bent knees. Cross one ankle over the opposite thigh and draw the supporting leg toward the chest. Use a seated version when floor movement is difficult.

    Seated Hamstring Stretch

    Sit near the edge of a sturdy chair. Extend one leg with the heel down and toes raised. Keep the back long and hinge forward from the hips.

    Standing Quadriceps Stretch

    Use a wall or chair for balance. Bend one knee and bring the heel toward the body, holding the ankle or pant leg. Avoid forceful pulling.

    Wall Calf Stretch

    Place both hands on a wall and step one foot back. Keep the rear heel grounded and lean forward. Repeat with the rear knee slightly bent.

    Supported Deep Squat

    Hold a countertop or sturdy chair. Lower into a comfortable squat while keeping the heels grounded when possible. Stop if the knees, hips, or back hurt.

    A Simple Four-Week Progression

    A Simple Four-Week Progression

    During week one, learn the positions and use 15-to-20-second holds. In week two, increase most holds to 25 or 30 seconds. During week three, repeat stretches that target your tightest areas. In week four, add a second round or try a slightly deeper variation without losing control.

    Sleep, stress, activity, temperature, and fatigue can affect range of motion. Focus on the overall trend rather than judging one session.

    How to Build a Lasting Habit

    Connect stretching to something already in your schedule. Practice after a walk, when finishing work, before an evening shower, or during a television break. Keeping a mat or towel visible can serve as a reminder.

    Measure progress through useful changes. Notice whether reaching, turning, squatting, or bending feels smoother. Practical improvements matter more than achieving an advanced pose.

    When to Get Professional Advice

    Persistent pain, numbness, swelling, sudden loss of movement, or symptoms following an injury should not be managed through stretching alone. A physician or physical therapist can identify the cause and recommend suitable movements. Guidance may also help when one side is considerably tighter or a joint feels unstable.

    Frequently Asked Questions

    1. Can How to Improve Flexibility with Daily Stretching work for beginners?

    Yes. Beginners can use short holds, supported positions, and a comfortable range before progressing.

    2. How long should a daily routine take?

    About 10 minutes is enough for a focused full-body session. Even five consistent minutes can be useful.

    3. Is morning or evening stretching better?

    Both can work. Morning movement may ease stiffness, while evening sessions may feel easier because the body is already warm.

    4. Should an effective stretch hurt?

    No. Aim for mild tension rather than sharp, burning, or increasing pain.

    A More Flexible Finish

    I have found that flexibility improves most reliably when the routine is manageable enough to repeat. Ten calm minutes can be more valuable than an intense session that is quickly abandoned. 

    I would prioritize steady breathing, safe technique, and small improvements in daily movement. With patience and consistency, the body can become less restricted, more mobile, and better prepared for the activities that matter.

  • How to Improve Stamina Gradually Without Burning Out

    How to Improve Stamina Gradually Without Burning Out

    I once believed stamina improved only when every workout felt difficult. That approach left me tired and inconsistent. I later learned that How to Improve Stamina Gradually is about using manageable challenges, repeating them regularly, and allowing enough recovery for the body to adapt. The real aim is to make exercise and everyday activities feel easier over time.

    Measure Your Starting Level

    Choose an activity such as walking, cycling, swimming, or dancing. Note how long you can continue comfortably before your breathing becomes difficult or your form declines.

    Rate the effort from one to ten and record how quickly your breathing settles afterward. During moderate exercise, you should usually be able to speak in short sentences without gasping.

    Understanding your current ability prevents you from copying a demanding routine designed for someone with a higher fitness level. It also gives you a clear starting point to improve flexibility with daily stretching and measure future progress.

    Build a Comfortable Cardio Base

    Walking is one of the easiest ways to build endurance. Start with ten to twenty minutes at a comfortable pace three times a week. When that feels manageable, add several minutes to one or two sessions.

    Increase only one factor at a time. Add duration before speed, or add another weekly session before making existing sessions harder. Most workouts should leave you feeling that you could have continued a little longer.

    Consistency is more valuable than completing one exhausting workout. A manageable routine performed regularly gives the heart, lungs, and muscles time to become more efficient.

    Strengthen the Muscles You Use Daily

    Strengthen the Muscles You Use Daily

    Two short strength sessions each week can make walking, climbing stairs to reach the top, carrying bags, and recreational exercise feel easier.

    Use chair squats, wall push-ups, step-ups, glute bridges, calf raises, and light rows. Start with one or two sets, maintain good form, and stop before complete fatigue. Add repetitions first, then introduce additional resistance when the exercises become easy.

    Strength workouts do not need to be lengthy. A focused session of fifteen to twenty minutes can provide meaningful benefits when it is performed consistently.

    Use Intervals Without Overdoing Them

    Intervals improve the body’s ability to handle brief periods of higher effort. Introduce them only after steady exercise begins to feel comfortable.

    During a walk, increase your pace for thirty seconds, then recover at an easy pace for one or two minutes. Repeat the pattern four times. As your fitness improves, extend the faster periods slightly or shorten the recovery periods.

    The harder section should feel challenging but controlled. Avoid sprinting or pushing until your technique breaks down. You should be able to recover and complete the remaining workout safely.

    Follow a Four-Week Beginner Plan

    Week 1: Establish the Habit

    Complete three easy cardio sessions lasting ten to twenty minutes. Add one short strength workout and keep the overall effort comfortable.

    Week 2: Increase the Duration

    Add about five minutes to one or two cardio sessions. Complete two strength training with at least one recovery day between them.

    Week 3: Introduce Faster Effort

    Add four short intervals to one cardio session. Keep the remaining workouts comfortable so your body has enough time to recover.

    Week 4: Progress One Element

    Increase either duration, pace, repetitions, or resistance. Do not change everything together. Finish the month feeling stronger rather than depleted.

    After completing the four weeks, repeat the structure with small adjustments instead of immediately moving to a highly demanding routine.

    Eat and Drink for Steady Energy

    Eat and Drink for Steady Energy

    Regular meals provide energy for activity and support muscle recovery. Include carbohydrates, protein, healthy fats, fruits, and vegetables throughout the day.

    Oats, rice, potatoes, fruit, and whole grains can fuel exercise. Eggs, fish, beans, lentils, tofu, dairy products, and lean meat provide protein that supports muscle maintenance and repair.

    Drink water regularly instead of waiting until you feel extremely thirsty. Hot weather, longer workouts, and heavy sweating may increase fluid needs.

    Caffeine can provide temporary alertness, but it should not be used to hide ongoing tiredness. Persistent fatigue may indicate that your routine, nutrition, sleep, or general health needs attention.

    Treat Recovery as Part of Training

    Fitness develops when exercise is followed by enough recovery. Consistent sleep supports energy, concentration, motivation, and muscle repair.

    Recovery days do not always require complete inactivity. Gentle walking, stretching, mobility exercises, or relaxed cycling can keep the body moving without creating excessive strain.

    Persistent pain, falling performance, irritability, sleep problems, or unusually heavy fatigue can signal that you need more rest. Reducing one workout is often better than forcing yourself through several poor-quality sessions.

    Track Real Signs of Progress

    You do not need expensive fitness devices to measure improvement. Progress may mean walking longer, recovering your breath faster, taking fewer breaks, completing more repetitions, or feeling less tired after ordinary tasks.

    Review your progress every two weeks. Daily energy changes naturally, so focus on the overall trend rather than one difficult session.

    Recording workout duration, perceived effort, sleep quality, and recovery can help you identify which habits support your performance.

    Frequently Asked Questions

    1. How long does it take to build stamina?

    Small improvements may appear within a few weeks, while larger changes can take several months. Starting fitness, health, sleep, recovery, and consistency affect the timeline.

    2. Can walking improve stamina?

    Yes. Brisk walking trains the heart, lungs, and leg muscles. Increase the duration or pace slowly as your fitness develops.

    3. What is the safest way to follow How to Improve Stamina Gradually?

    Begin below your maximum ability, increase one training factor at a time, and balance harder sessions with easy activity and rest.

    4. Should I exercise every day?

    Daily movement can be helpful, but every session should not be demanding. Alternate structured workouts with gentle activity or complete rest based on how your body feels.

    Final Takeaways

    I have found that lasting stamina comes from patience rather than punishment. Small workouts repeated consistently can be more useful than occasional sessions that leave me exhausted. By starting realistically, progressing one element at a time, and protecting recovery, I can become stronger without losing motivation.

    The best routine is one that fits ordinary life. Five extra minutes of walking, one controlled interval, or a few additional repetitions may seem minor, but these changes accumulate. I focus on consistency, practical improvements, and giving my body enough time to adapt.

  • How To Handle Awkward Social Moments With Confidence

    How To Handle Awkward Social Moments With Confidence

    Learning how to handle awkward social moments does not require perfect timing or a flawless personality. I focus on recovery, not performance. A calm sentence, a small smile, and one genuine question can turn discomfort into an ordinary human moment.

    My method is the Acknowledge–Bridge–Invite reset. I name what happened, move toward safer ground, and invite the other person back into the exchange.

    Why Awkward Moments Feel Worse Than They Look

    Awkwardness turns attention inward. Your thoughts speed up, and a minor mistake starts to feel much larger than it appears.

    The Spotlight Effect Magnifies Mistakes

    Researchers use the term “spotlight effect” for our tendency to overestimate how much other people notice us. In a classic study, participants wearing an embarrassing T-shirt expected far more observers to remember it than actually did.

    Most people are managing their own words and worries. For me, how to handle awkward social moments begins with shrinking the imagined audience.

    Embarrassment Can Signal That You Care

    Embarrassment is not always social failure. Research has linked it with generosity and concern for social expectations.

    I do not need to appear untouched. I need to show awareness, respect, and the ability to continue.

    How To Handle Awkward Social Moments In Real Time

    How To Handle Awkward Social Moments In Real Time

    The Acknowledge–Bridge–Invite reset prevents two common mistakes: pretending nothing happened and apologizing until everyone feels worse.

    Acknowledge Without Performing An Apology

    Use one short sentence:

    “That came out strangely.”

    “I completely lost my train of thought.”

    “That sounded better in my head.”

    Keep the tone warm. A brief acknowledgment releases tension, while a long explanation traps everyone inside it. Expert advice also favors quick acknowledgment, gentle humor, and redirection.

    One sincere apology is enough when your mistake affected someone. Repeating it can place pressure on the other person to comfort you.

    Bridge Toward A Useful Topic

    Correct the mistake or return to your point. You could say:

    “What I meant was that the deadline surprised me. How is your part going?”

    The bridge gives the conversation somewhere useful to land. It prevents the awkward moment from becoming the main event.

    Invite The Other Person Back In

    Ask one open question or make a genuine observation. This restores a natural rhythm.

    The complete reset may take ten seconds:

    “That sounded better in my head. You mentioned a new role—how has the first month been?”

    This is my most reliable answer for how to handle awkward social moments without creating a larger performance.

    Scripts For Common Social Blunders

    Scripts For Common Social Blunders

    How to handle awkward social moments becomes easier when a few flexible lines are ready.

    When You Forget A Name

    Say, “My brain just blanked. Please remind me of your name.”

    Directness shows respect and prevents a second problem later. Most people prefer a sincere request over watching someone avoid their name all evening.

    When Someone Interrupts You

    Let the overlap pass. Then say, “I want to return to one quick point from earlier.”

    This protects your place without competing for volume. Your calm delivery matters more than sounding forceful.

    When Your Joke Falls Flat

    Try, “That joke had a better rehearsal,” and change the subject.

    Use gentle humor, not self-attack. Calling yourself stupid or socially hopeless makes other people feel responsible for reassuring you.

    When Someone Is Rude

    Ask, “What did you mean by that?”

    You can also say, “I’m not comfortable with that comment.”

    Leave if the person becomes hostile. Knowing how to handle awkward social moments does not require tolerating disrespect.

    How To Handle An Awkward Silence Calmly

    How To Handle An Awkward Silence Calmly

    Silence becomes painful when I treat it as an emergency. I take one slow breath, relax my shoulders, and wait two beats.

    Then I return to the last topic, ask a specific follow-up, or close politely.

    “It was good talking with you. I’m going to grab a drink” is a complete exit.

    Avoid filling every pause with random facts or several rapid questions. Ask one question, listen fully, and build from the answer.

    A pause does not always mean the conversation has failed. The other person may simply be thinking, distracted, tired, or deciding what to say next.

    How To Stop Replaying Awkward Interactions

    The hardest part of how to handle awkward social moments may begin after the conversation ends. Your body leaves, but your mind starts producing edited replays.

    Learning how to create a low-maintenance lifestyle can reduce mental clutter and make it easier to let go of minor social mistakes.

    Separate Facts From Predictions

    Write what happened:

    “I forgot her name.”

    Then write the conclusion you added:

    “She thinks I am careless.”

    Only the first statement is confirmed. The second is mind-reading.

    This distinction prevents an ordinary mistake from becoming a story about your personality or social value.

    Use A Two-Minute Review

    I ask three questions:

    Did I hurt anyone?

    Is a repair needed?

    What will I try next time?

    If no repair is needed, the review ends. I move into an absorbing task.

    When an apology is necessary, I keep it direct: “I realized my comment sounded dismissive. I’m sorry. That was not fair to you.”

    A clear repair is more useful than hours of private shame.

    Choose Self-Compassion Over Self-Excusing

    Self-compassion means correcting what matters without turning one mistake into an identity. Research has associated greater self-compassion with lower social interaction anxiety and more adaptive emotion regulation.

    My useful sentence is:

    “That was uncomfortable, and I can recover.”

    That response accepts responsibility without treating embarrassment as evidence that I should avoid future conversations.

    Build Social Confidence Through Small Repetitions

    Build Social Confidence Through Small Repetitions

    Social ease grows through low-stakes practice: greeting a cashier, asking a coworker a follow-up, or attending an event briefly.

    These habits support the wider goal of being more confident in social situations. Confidence is not the absence of awkwardness. It is evidence that you can keep functioning while discomfort is present.

    Repeated exposure turns how to handle awkward social moments from a theory into a skill.

    Track the recovery, not the performance. “I stayed in the conversation” teaches more than “I sounded impressive.”

    You can also choose one social skill to practice each week. Focus on remembering names, asking better follow-up questions, ending conversations politely, or speaking after an interruption.

    Small repetitions create usable confidence because they give your brain evidence that discomfort is survivable.

    When Awkwardness May Be Social Anxiety

    Occasional discomfort is normal. Persistent fear, avoidance, physical distress, or interference with work and relationships may need professional attention.

    The National Institute of Mental Health estimates that 7.1% of U.S. adults experience social anxiety disorder in a given year. NIMH describes cognitive behavioral therapy as a well-studied treatment and notes that exposure therapy can help people gradually face avoided situations.

    Consider speaking with a qualified professional when fear causes you to avoid work events, classes, dating, appointments, or everyday conversations.

    A licensed professional can assess symptoms and recommend care. Learning how to handle awkward social moments does not replace treatment when anxiety controls daily choices.

    Your Awkward Era Does Not Need A Sequel

    A social mistake grows when you keep feeding it. Name the moment, make a short bridge, invite connection, and continue.

    I no longer judge a conversation by whether every second felt smooth. I judge it by whether I remained respectful, recovered honestly, and stayed present.

    The next time a conversation stalls, use one steady sentence instead of chasing perfection. That small recovery is how to handle awkward social moments with more confidence and far less drama.

    Frequently Asked Questions

    1. How Do You Recover Quickly From An Awkward Conversation?

    Acknowledge the tension briefly, change direction, and ask one open-ended question.

    2. What Should I Say After An Embarrassing Mistake?

    Say, “That came out wrong—what I meant was…” and restate your point clearly.

    3. How Can I Stop Overthinking An Awkward Interaction?

    Separate facts from assumptions, decide whether repair is needed, and end the review after two minutes.

    4. Can Learning How To Handle Awkward Social Moments Reduce Social Anxiety?

    It may strengthen coping skills, but persistent or disabling anxiety should be discussed with a qualified professional.

  • Carry-On Guide:Minimalist Packing List For Two Weeks

    Carry-On Guide:Minimalist Packing List For Two Weeks

    Walking up to the airport baggage carousel only to realize your luggage went to a completely different continent is a special kind of travel heartbreak. Watching fellow travelers breeze through terminal gates with nothing but a sleek backpack makes you wonder what secret they know that you do not. 

    Shifting to a minimalist packing list for two weeks changes the entire way you experience the world by replacing heavy bulk with ultimate physical freedom. Traveling light is not about deprivation or wearing dirty clothes, but rather about maximizing the utility of every item you choose to carry.

    How To Build Your Ultimate Capsule Wardrobe

    Mastering a lighter bag requires an intentional shift in how you view your clothing choices. For a two-week trip, use a carry-on only approach by building a versatile capsule wardrobe and embracing destination laundry.

    Choose Five Strategic Tops

    Pack exactly 5 tops to form the core of your daily style rotation. Select a smart mix of versatile T-shirts, breathable tank tops, and one dressy blouse that transitions beautifully from a daytime museum tour to an upscale evening dinner. Sticking to neutral tones ensures that every single top coordinates effortlessly with any bottom you choose.

    Pick Four Reliable Bottoms

    Bring 4 bottoms to cover every possible activity on your travel itinerary. Include 1 pair of comfortable jeans or trousers for long travel days, 1 pair of lightweight casual pants, 1 skirt or dress for warmer days, and 1 pair of shorts. This variety ensures you are prepared for both outdoor adventures and city exploration.

    Layer With Three Coordinated Pieces

    Layer With Three Coordinated Pieces

    Incorporate 3 layers to handle unpredictable weather changes or chilly air-conditioned spaces. Select 1 lightweight jacket or structured blazer, 1 cozy sweater or zip-up hoodie, and 1 classic button-down shirt. These pieces can be stacked together for maximum warmth or worn individually to completely alter the look of your outfits.

    Streamline Your Undergarments and Loungewear

    You only need 7 pairs of underwear and socks if you rely on wash-and-wear fabrics and sink wash for the second week. Add 2 or 3 comfortable bras along with 1 set of cozy pajamas, 1 functional swimsuit, and 1 versatile activewear set perfect for unexpected hiking or casual lounging.

    Select Smart Footwear for Infinite Walking

    Shoes consume the most physical space and add the most weight to your luggage, making them a critical area to optimize to look more put together. Keeping your total footwear count low prevents your pack from becoming uncomfortably bottom-heavy.

    Wear Your Best Walking Shoes

    Step onto the airplane wearing 1 pair of walking shoes, specifically comfortable and stylish sneakers. These will serve as your primary footwear for long walking tours, city exploration, and transit days. Wearing them during travel days saves massive amounts of space inside your main carry-on bag.

    Pack Versatile Sandals or Flats

    Slide 1 pair of versatile sandals or flats into your backpack for dressier occasions. These should be elegant enough for fine dining or evening shows but comfortable enough to wear during a casual afternoon stroll.

    Toss in Lightweight Flip-Flops

    Bring 1 pair of lightweight flip-flops to wrap up your footwear selection. These take up almost zero physical space and are incredibly useful for hot springs, pool decks, or hostel and hotel room use.

    Streamline Personal Care Items and Toiletries

    Managing your self care routine while traveling light means focusing exclusively on the absolute essentials. Shifting away from bulky bottles keeps your pack lightweight and compliant with global transit security rules.

    Streamline Personal Care Items and Toiletries

    Focus on Travel-Sized Essentials

    Pack travel-sized essentials including solid deodorant, a toothbrush, and a mini tube of toothpaste. Choosing compact versions of these daily items ensures they fit neatly into a small corner of your bag.

    Transition to Smart Liquid Containers

    Pack multi-use items like shampoo or body wash bars, or transfer your current liquids into TSA-approved 3.4-ounce containers. Utilizing solid product alternatives completely eliminates the risk of messy fluid spills ruining the inside of your luggage.

    Keep a Basic First Aid Kit

    Assemble a miniature health kit containing essential items like band-aids, tweezers, and common pain relievers like ibuprofen. Having these basic remedies on hand saves you the hassle of hunting down a local pharmacy in an unfamiliar city.

    Organize Essential Travel Electronics and Gear

    Keeping your tech and hardware accessories streamlined prevents your pack from turning into a chaotic mass of tangled cords. Choosing multi-functional gear ensures you stay connected without carrying unnecessary weight.

    Organize Essential Travel Electronics and Gear

    Consolidate Core Electronic Tools

    Bring only your phone, a durable phone charger, and a high-capacity portable power bank to maintain battery life on long transit days. Leave heavy laptops and extra tablet stands at home unless you are explicitly working remotely while on the road.

    Gather Useful Lifestyle Accessories

    Protect yourself from the elements by packing 1 pair of polarized sunglasses, a packable sun hat, and a compact crossbody bag or daypack. This small day bag will serve as your daily companion while your main carry-on stays securely at your accommodations.

    Compress Everything With Packing Cubes

    Utilize 2 or 3 packing cubes or compressible laundry bags to organize your clothing items by category. Rolling your clothes tightly and zipping them into these cubes eliminates wasted air space entirely. It keeps your bag perfectly organized.

    Frequently Asked Questions

    1. What is the 5 4 3 2 1 packing rule?

    The 5 4 3 2 1 packing rule is a simple countdown system designed to help travelers build a minimalist packing list for two weeks. It structures your luggage around five pairs of socks and underwear, four tops, three bottoms, two pairs of shoes, and one hat or outerwear layer.

    2. How to pack minimally for a 2 week trip?

    To build a minimalist packing list for two weeks, adopt a carry-on only mindset by packing a coordinated capsule wardrobe and washing clothes midway through. Wear your heaviest shoes on transit days and use compression packing cubes to eliminate empty space.

    3. How many outfits should I bring for a 2 week trip?

    You should bring enough individual pieces to mix and match into roughly seven unique outfit combinations for a two-week trip. Planning a quick laundry session at your destination allows you to easily rotate these same clothing items for the second week.

    4. What is the 3 5 7 rule for packing?

    The 3 5 7 rule is a lightweight travel strategy that dictates packing three pairs of shoes, five sets of clothing tops and bottoms, and seven pairs of undergarments. This creates a highly efficient one-week supply that fits beautifully inside any standard carry-on bag.

    Ditch The Baggage & Enjoy Carry-On Freedom

    Embracing a minimalist packing list for two weeks is the ultimate gift you can give yourself before stepping out to explore the world. Ditching giant suitcases allows you to skip stressful check-in lines, bypass baggage claim chaos, and move through trains and cobblestone streets with absolute ease. Focus on the unforgettable memories you are about to make. Rather than the material things you are carrying on your back.

  • Fly Stress-Free With Rules for Traveling with a Dog Revealed

    Fly Stress-Free With Rules for Traveling with a Dog Revealed

    Navigating the rules for traveling with a dog can feel like studying for a complex legal exam. Millions of pet parents map out dream vacations each year, only to face massive heartbreaks at airport boarding gates because a single rule changed. Let’s make sure you never experience that anxiety by unpacking the practical realities of modern pet travel.

    Key Takeaways

    • Official federal guidelines mandate microchips.
    • Domestic flights require early bookings.
    • Airlines strictly measure closed carriers.
    • TSA checkpoints require hand swabbing.
    • Travel rule timelines protect pups.

    Why Do These Complex Rules Exist Anyway?

    Let’s be completely honest about why we have to jump through so many administrative hoops before we hit the open road or take off into the sky. Without strict standards, our journeys would quickly turn into a chaotic circus of escaped animals, health scares, and deeply stressed pets. These universal guidelines keep your best friend safe and healthy while ensuring human passengers stay safe too.

    Road Trips: Vehicles and Highway Safety

    Secure Your Dog Before Starting the Drive

    A road trip with your dog requires more preparation than simply opening the window and heading onto the highway. Proper restraint is essential because sudden braking, sharp turns, or a collision can seriously injure an unsecured pet.

    Take care of your dog safely contained throughout the journey. A crash-tested harness, secured travel crate, or sturdy pet barrier can help protect both your dog and the other passengers in the vehicle.

    Keep Your Dog Away From the Front Seat

    Keep Your Dog Away From the Front Seat

    Never allow your dog to travel on your lap, sit in the front passenger seat with an active airbag, or lean their head far outside the window. Airbags deploy with significant force and can cause fatal injuries to a dog.

    The safest place is usually the rear seat or secured cargo area, depending on your vehicle and the restraint system being used. Keeping your dog properly positioned also reduces distractions while you are driving.

    Schedule Regular Rest Stops

    Long stretches on the road can be physically uncomfortable and stressful for dogs. Plan to stop every two to three hours so your pet can stretch, drink water, and relieve themselves.

    Attach the leash securely before opening the vehicle door. This simple step helps prevent your dog from running into traffic or becoming lost at an unfamiliar rest area.

    Pack Essential Road Trip Supplies

    Bring enough of your dog’s regular food for the entire trip, along with collapsible bowls, fresh or bottled water, waste bags, medications, and basic grooming supplies. Measuring meals in advance can make feeding easier while travelling.

    Maintaining your dog’s usual diet and feeding schedule may help reduce stress-related digestive problems. Packing familiar treats, bedding, or a favourite toy can also make new environments feel more comfortable.

    Air Travel: Flying Inside the Cabin

    Air Travel Flying Inside the Cabin

    Check the Airline’s Pet Travel Rules

    Flying with your dog requires careful compliance with airline regulations and carrier-size restrictions. Aircraft cabins are tightly controlled environments, and airline staff have the final authority to approve or refuse boarding.

    Review your chosen airline’s pet policy well before booking, as most flights allow only a limited number of animals in the cabin. Reserving your dog’s place early can help prevent last-minute travel problems.

    Choose an Airline-Approved Pet Carrier

    Dogs travelling in the cabin must remain inside an airline-approved carrier that fits completely beneath the seat in front of you. The carrier must stay securely closed and properly stowed for the duration of the flight.

    Select a carrier large enough for your dog to stand, turn around, and lie down comfortably. Always confirm the airline’s exact carrier dimensions, as under-seat space and size limits may vary between aircraft.

    Prepare the Required Health Documents

    The documents needed for pet travel depend on your destination. Domestic journeys may involve fewer requirements, while international travel can require veterinary health certificates, vaccination records, import permits, and other official approvals.

    For overseas trips, review the destination country’s current entry requirements and consult the USDA APHIS website. Some documents must be completed or signed by an accredited veterinarian within a specific period before departure.

    Budget for Airline Pet Fees

    Pet travel fees should be included in your overall flight budget. Many airlines charge approximately $100 to $150 each way for a dog travelling in the cabin, although the exact amount depends on the airline and route.

    Check the latest fee directly with the airline before booking. Pet fees are usually charged separately from your passenger ticket and may apply to every segment of a connecting journey.

    International Travel and Global Health Regulations

    Research the Destination’s Pet Entry Rules

    Travelling internationally with a pet requires careful planning because each country has its own health, vaccination, identification, and import requirements. These rules are designed to limit the spread of infectious diseases between regions.

    Review every requirement well before departure. Missing even one document or deadline could lead to denied entry, additional testing, or quarantine at the owner’s expense.

    Prepare the Correct Rabies Documentation

    Rabies rules are especially important when entering or returning to the United States from certain countries. Depending on your dog’s travel history and vaccination status, you may need official rabies records or additional forms completed before departure.

    Have the documents prepared by an authorised or USDA-accredited veterinarian when required. Always verify the latest CDC and USDA guidance, as the exact paperwork can vary according to the country of origin and your dog’s vaccination history.

    Check the Microchip Requirements

    Many international destinations require pets to have an ISO-compliant 15-digit microchip for permanent identification. The microchip number must match the details shown on vaccination certificates, health records, and import documents.

    In many countries, the microchip must be implanted before the rabies vaccination is given. When the vaccination date comes before the recorded microchip date, the vaccine may not be accepted for international entry, which could require revaccination and a new waiting period.

    Simple Steps for Navigating Airport Security Lines

    Simple Steps for Navigating Airport Security Lines

    Getting through the TSA security checkpoint with an enclosed pet can be the most stressful moment of your entire air travel day. Knowing the exact physical sequence allows you to move through the metal detectors quickly without losing control of your dog.

    Rules for traveling with a dog require you to physically remove your pup from their bag at the security checkpoint line. Send the empty soft-sided carrier through the standard X-ray machine conveyor belt along with your regular carry-on luggage. Never allow your live dog to pass through the baggage X-ray machine under any circumstances.

    Hold your dog tightly in your arms or lead them on a non-metal slip leash as you walk through the human metal detector framework. Once you pass through the archway, a TSA officer will swab your hands to test for explosive residue because you carried an animal. Walk over to a quiet bench area past the chaotic lines to safely place your dog back into their secure carrier.

    Frequently Asked Questions

    1. What is the 3-3-3 rule for dogs?

    The 3-3-3 rule details the standard emotional stages a dog experiences when entering a brand-new home or environment. It tracks three days of feeling overwhelmed, three weeks of learning a routine, and three months of building secure trust.

    2. What are the requirements to travel with a dog on a plane?

    You must secure an official airline pet reservation, pay the transit fee, and utilize an FAA-approved under-seat carrier bag. The dog must remain completely zipped inside the carrier while at the airport and onboard the aircraft.

    3. Can a dog be left alone for 5 days?

    No, a dog cannot be left alone for 5 days under any circumstances. Dogs are highly social animals that require daily feeding, fresh water, bathroom breaks, and human interaction to prevent severe separation panic and medical crises.

    4. What is the 7 7 7 rule for dogs?

    The 7 7 7 rule is a developmental socialization guide used for young puppies during their early learning windows. It suggests introducing your puppy to seven new surfaces, seven unique objects, and seven different people every single week.

    Smooth Sailing and Happy Tails Across the Horizon

    Mastering the rules for traveling with a dog ensures your next major adventure is completely free of airport stress or roadside emergencies. 

    By organizing your health paperwork early, selecting the right crash-tested travel gear, and following airline compliance laws, you protect your dog’s safety. Keep this ultimate guide handy for your next big journey, pack plenty of patience, and enjoy making beautiful travel memories with your favorite furry companion.

  • How to Create a Low Maintenance Lifestyle That Lasts

    How to Create a Low Maintenance Lifestyle That Lasts

    A simpler life is not built by squeezing more chores into a prettier planner. Learning how to create a low maintenance lifestyle means reducing the tasks, choices, objects, and obligations that keep demanding your attention.

    I treat every repeated task as a “maintenance tax.” Some taxes are necessary. Others exist because I own too much or keep solving the same problem manually. The goal is not neglect. It is thoughtful effort now that prevents avoidable effort later.

    Start With a Maintenance-Tax Audit

    Start With a Maintenance-Tax Audit

    Track everything that repeatedly drains your time for one week. Include cleaning, laundry, shopping, grooming, meal planning, bills, notifications, errands, and unwanted commitments.

    Then calculate the annual cost. A task that takes only 10 minutes each day consumes about 61 hours per year. That calculation changed how I evaluate seemingly small inconveniences. When I consider how to create a low maintenance lifestyle, I fix frequent friction before rare problems.

    Remove, Reduce, Automate, or Standardize

    Run each recurring task through four filters. Can you remove it completely? Can you reduce its frequency? Can you automate it safely? Can you create one default method?

    You might remove promotional emails, reduce clothing choices, automate savings, and standardize weekday breakfasts. This cuts upkeep without turning life into a rigid minimalist project. It is the simplest framework I know for how to create a low maintenance lifestyle without buying more products.

    Build a Low-Maintenance Home Environment

    Build a Low-Maintenance Home Environment

    A calm home should be easy to reset, not merely attractive after a major cleaning day. At home, how to create a low maintenance lifestyle becomes a design question: what can be cleaned, stored, and reset quickly?

    Research has connected stressful home descriptions, including clutter, with less favorable cortisol patterns. Experimental findings also suggest that household chaos can increase stress and negative emotions.

    Own Less and Give Everything a Home

    I start with visible surfaces because they deliver the quickest improvement. Kitchen counters, bathroom vanities, desks, and entry tables should hold only items used in those locations.

    I also avoid organizing possessions I no longer need. Storage containers may hide excess, but they do not remove maintenance. Every possession creates future cleaning, repair, storage, or replacement work.

    Give every necessary item one permanent home. The storage location should also match where you use it. Keeping cleaning supplies near the rooms they serve removes extra steps from routine chores.

    Choose Easy-Clean Materials and Simple Systems

    I favor washable fabrics, dishwasher-safe kitchenware, durable finishes, and furniture with accessible surfaces. I avoid items requiring special cleaners or professional care unless I value them enough to justify the extra work.

    Choose wipeable upholstery, machine-washable rugs, simple glassware, and clothing that does not require dry cleaning. When replacing windows or exterior materials, compare their painting, sealing, and repair needs before focusing only on appearance.

    Utility upgrades can reduce ongoing costs. EPA WaterSense-labeled bathroom faucets can reduce water flow by 30 percent or more without sacrificing performance.

    Use a Daily Closing Shift

    Spend 10 minutes each evening restoring your home’s baseline. Load the dishwasher, clear counters, prepare tomorrow’s essentials, and return stray items to their assigned places.

    Use the one-minute rule throughout the day. If you can rinse, wipe, file, or put something away immediately, do it. This prevents tiny messes from becoming exhausting weekend projects.

    I also keep cleaning supplies simple. One dependable multipurpose cleaner is often easier to manage than several products with narrow uses.

    Simplify Personal Care With a Capsule Wardrobe

    Simplify Personal Care With a Capsule Wardrobe

    Clothing becomes demanding when every morning requires fresh decisions. In personal style, how to create a low maintenance lifestyle starts with fewer dependable combinations.

    Repeated decision-making may contribute to decision fatigue, although research shows that its effects can vary by person and context.

    Create Three Reliable Outfit Formulas

    I do not need a tiny wardrobe. I need a compatible one. I choose a limited color palette, comfortable fabrics, and pieces that work across several settings.

    Three outfit formulas can cover most normal days. Examples include jeans with a fitted top, trousers with a knit, or a simple dress with one dependable layer.

    Keep seasonal, formal, and activity-specific clothing separate from your daily wardrobe. For anyone learning how to create a low maintenance lifestyle, outfit formulas are more useful than following an arbitrary capsule wardrobe number.

    Use the Minimum Effective Grooming Routine

    Keep personal care simple, consistent, and easy to restock. Choose low-fuss hairstyles, repeatable makeup, and multipurpose products that perform well.

    Your routine should fit an ordinary rushed morning, not an imaginary perfect schedule. Save product names in one note so replacements do not require fresh research.

    Schedule routine haircuts, dental visits, physicals, and other preventive appointments before they become urgent. Low maintenance means preventing avoidable crises, not postponing necessary care.

    Reduce Digital and Financial Upkeep

    Reduce Digital and Financial Upkeep

    Digital clutter creates invisible maintenance. Turn off nonessential notifications, unsubscribe from marketing lists, remove unused apps, and keep one trusted place for tasks.

    Check messages at set times instead of reacting throughout the day. The American Psychological Association notes that switching between complex tasks carries productivity costs. Digital distraction may also leave people feeling mentally drained.

    Learning how to create a low maintenance lifestyle also requires careful financial automation. Use automatic payments for predictable bills and recurring transfers for savings.

    The Consumer Financial Protection Bureau says automatic payments can support timely payment, but account balances still need monitoring. Poor timing between incoming deposits and scheduled withdrawals may cause overdraft fees.

    I keep one monthly money review. Automation handles repetition, while the review catches billing errors, price increases, duplicate charges, and subscriptions I no longer use.

    Create a Low-Maintenance Schedule and Daily Routine

    Choose three meaningful priorities each day and leave room for delays. A packed calendar may look efficient, but one late task can disrupt everything scheduled after it.

    Batch errands by location. Group similar administrative tasks. Keep default times for groceries, laundry, exercise, meal preparation, and weekly planning.

    These dependable routines support simplifying your schedule and lifestyle without rebuilding each week from scratch.

    When deciding how to create a low maintenance lifestyle, I use “no” as a maintenance tool. Every recurring meeting, membership, volunteer role, or social commitment adds preparation, travel, communication, and recovery time.

    Before agreeing, ask whether the activity supports a current priority. Do not accept a permanent obligation to solve a temporary feeling of guilt.

    Replace Multitasking With Single-Task Blocks

    Work on one demanding task at a time and close unrelated tabs. Task switching may feel productive because you remain busy, but each switch requires you to regain context.

    The APA reports that task switching can reduce productive time, especially when tasks are complex or unfamiliar.

    I prefer clear blocks with one defined result. A block might cover paying invoices, writing a report, planning meals, or handling appointments. Finishing one category lowers mental residue before I move to another.

    Protect Health Habits That Prevent Bigger Problems

    Low maintenance should never mean ignoring your health. I prioritize a stable sleep window, simple movement, repeatable meals, hydration, and preventive care.

    The CDC recommends at least seven hours of sleep for most adults and 150 minutes of moderate-intensity physical activity each week. Regular physical activity can also improve sleep and reduce anxiety.

    Make these habits easier through defaults. Keep two quick breakfasts, three repeatable lunches, walking shoes near the door, and a fixed bedtime alarm.

    Choose nutritious meals you can prepare consistently instead of complicated recipes requiring rare ingredients. That is how to create a low maintenance lifestyle without depending on daily motivation.

    How to Create a Low Maintenance Lifestyle in Seven Days

    Begin with a focused seven-day reset rather than a dramatic life overhaul.

    On the first day, clear one visible surface. Next, remove ten clothing items that do not serve your current life. Turn off nonessential notifications on day three.

    Then automate one stable payment or savings transfer and activate a low-balance alert. Cancel one unwanted subscription or commitment. Create three meal or outfit formulas.

    On the final day, identify which change saved the most effort. Make that system permanent before adding another improvement.

    This method works because it removes friction without becoming another large project that requires constant motivation.

    Frequently Asked Questions

    1. How do I start a low-maintenance lifestyle when I feel overwhelmed?

    Choose one repeated annoyance, remove one unnecessary step, and test the simpler system for seven days.

    2. Can I live simply without becoming a minimalist?

    Yes. Keep what adds value, but make each possession, routine, and commitment easy to use and maintain.

    3. What should I automate first?

    Start with predictable tasks carrying low error risk, such as calendar reminders, savings transfers, and stable recurring bills.

    4. How to create a low maintenance lifestyle on a small budget?

    Reduce possessions, standardize meals and outfits, cancel unused services, and improve existing routines before purchasing new tools.

    Your Life Does Not Need a Full-Time Manager

    I believe how to create a low maintenance lifestyle comes down to one question: what keeps demanding effort without returning enough value?

    My next step would be a maintenance-tax audit, not a shopping trip. Track recurring friction for seven days. Then remove, reduce, automate, or standardize the costliest problem.

    A lighter life rarely arrives through one dramatic decision. It begins when one frustrating system no longer needs to be rescued.